muicache! – installation and user guide
muicache! as already mentioned in the project presentation post, is composed of two basic components/scripts: "Client" and "Server". The "Client" has to be executed by every network user during the login phase and it is going to collect a series of information which are based on the contents of the registry key "HKEY_CURRENT_USER\Software\Microsoft\Windows\ShellNoRoam\MUICache"; the collected informations will be stored in XML format in a shared folder of any network server. In that way, the component "Server" will be able to elaborate them aiming to populate a database and create an XLS report. As you can see, the process is very simple and for the implementation it's sufficient having a simple Logon Script Policy and a shared folder.
Installation of the "Server" component
Download the archives muicache.zip which contain all the toolkit's files.
Download the Microsoft utility fciv.exe which cannot be included in the above mentioned package because of the copyright, this is the link for the direct download.
Connect to the server which will contain the muicache! files, create a new folder (path and name are not relevant, for convenience: "C:\muicache") and copy the following files in it:
- CollectData&XLSOutput.vbs
- exclusions.txt
- muicache.mdb
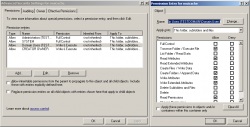
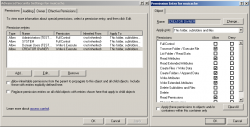
The folder has to be shared with the following permission "Full Control Everyone", and as for the ntfs-security permissions I suggest to be very restrictive. They have to be set up as follows (copy and paste command):
xcacls c:\muicache /G Administrators:F /Y | xcacls c:\muicache /G SYSTEM:F /E /Y | xcacls c:\muicache /G "Domain Users":XW /E /Y | xcacls c:\muicache /G "CREATOR OWNER":XW /E /Y
In reality it would be enough to assign the "Modify" permission to the "Domain Users" group but doing so you will not be able to guarantee the security/privacy of the database and its files.
For those who want to set the security manually without using the above mentioned command, watch the following screenshots:
This setup will stop the "Domain Users" from snooping around in the toolkit's files and folders.
- CollectData&XLSOutput.vbs is the "Server" script which imports the files within the database muicache.mdb and exports them creating an XLS report.
- exclusions.txt is a text file which will be used by CollectData&XLSOutput.vbs for filtering the XLS report; further details in the next section of the article.
- muicache.mdb is the database used by CollectData&XLSOutput.vbs
Installation of the "Client" component
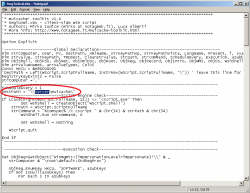
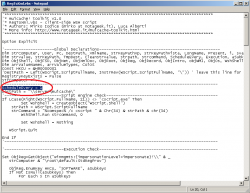
Extract RegToXml.vbs in a temporary folder and open it with a text editor. For the correct use of this script you have to modify the variable "DestPath" which is at line 21. Its value has to be equal to the UNC path of the shared folder you created before.
Remember that a UNC path looks like as follows:
\\server_ip\shared_folder_name
If you consider it necessary you can also modify the variable "ScheduleEvery" which you can find at line 20. Its value represents the minimum number of days before the script collects new data. The pre-defined value "1" means that RegToXml.vbs will be executed maximum once a day, and as for the value "7" which means that the execution is made once a week. Setting the value to "0" instead enable the execution of the script every time a user logs in, this can happen several times during a day.
Once done the required modifications, save and close the text editor.
Now you are able to go on with the Logon Script Policy setup which is necessary to lead the execution of RegToXml.vbs for every user. Together with it you have to distribute the fciv.exe which is necessary for calculating the hash.
Create a new Group Policy object and link it to an organizational unit or, if you prefer, to the whole domain.
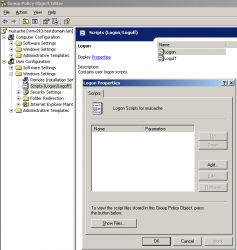
Open the GPO editor and go to the following section:
User Configuration\Windows Settings\Scripts (Logon/Logoff)
Select "Logon" (in the right panel) and you will be in a similar situation as shown by the following screenshots:
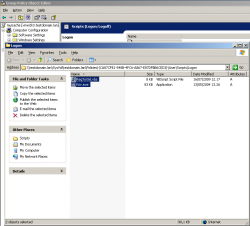
Select "Show files"... and a window will be opened showing the content of an empty folder. Copy the files fciv.exe and RegToXml.vbs in it.
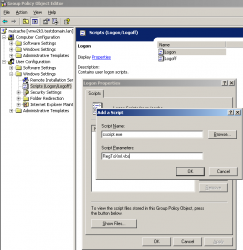
Close the window and select "Add". A new dialogue window will be opened, it is required to specify two values: "Script Name" and "Script Parameter". Set the first one equal to "cscript.exe" and the second one to "RegToXml.vbs".
Select "OK" and close all the open windows. muichache! is now installed and it will collect all data starting with the next user's login. The collected data will appear in the shared folder as XML files. In specific, it is going to be created a file for every user/PC combination.
Video installation step-by-step
User Guide: database, reports and filters
The files collected by RegToXml.vbs and memorized in the shared folder can be imported in the database muicache.mdb at any moment. You only have to execute CollectData&XLSOutput.vbs by double clicking on it or from the command line:
cscript.exe "c:\muicache\CollectData&XLSOutput.vbs"
Using the command line "cscript.exe" you will see several messages reporting the status of the execution. Using "wscript.exe" instead you won't get any feedback and you will have to wait until the process ends. On the 64 bit systems it is necessary to use the WSH engines ("cscript.exe" and "wscript.exe") located in the folder "C:\Windows\SysWOW64" instead of those predefined located in "C:\Windows\System32".
You might also take in consideration the possibility of executing it on regular intervals by a scheduled task. The database will be filled using an incremental approach so there will be no risk of creating double records.
Finally, after having imported the files, a report in XLS format (muichache.xls) will be generated, it can be opened using Microsoft Office or OpenOffice.org Calc. You will find an example in the videos posted in the project presentation post.
Every line (record) of the report is composed by a series of information (fields) which refer to a file tracked by the "HKEY_CURRENT_USER\Software\Microsoft\Windows\ShellNoRoam\MUICache" registry key of a determined user logged on a determined computer.
- computer, name of the computer on which the file was executed.
- user, user's name who executed the file
- mui_name, path of the executed file
- mui_desc, description of the executed file
- mui_version, version of the executed file
- mui_hash, MD5 hash of the executed file
- first_detection, date of the first XML in which appears the executed file
- last_detection, date of the last XML in which appears the executed file
- xmldata, date of the last XML available
- xmlname, name of the XML in which was revealed the data of the executed file
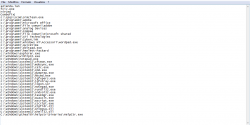
There is also a way to filter and simplify the report. muichache! is able to set a permanent filter which excludes all those records containing specific text strings in the "mui_name" and "mui_desc" fields. The filter is based on the "exclusion.txt" file and can be populated with simple words or complete paths which enable the exclusion from the report of those programs that you consider as "authorized". You can see a filter example in the following picture:
It's important to note that a filtered record is not removed from the database. A filtered record is simply excluded from the report view and can be reintegrated whenever you want, you just have to remove from the "exclusion.txt" file all the words corresponding to it.
Print This • Email this • Twit This! • Add to del.icio.us • Share on Facebook • Digg This! • Stumble It! • AddThis! • Share on Segnalo Alice • Share on OKNotizie
